Are you looking for an easier way to install beautiful, durable, real clay brick walls? BrickPanel+ by Old Mill Brick is the easiest option for installing brick both indoors and outdoors. It works for walls, floors, ceilings, and soffits.
What is BrickPanel+?
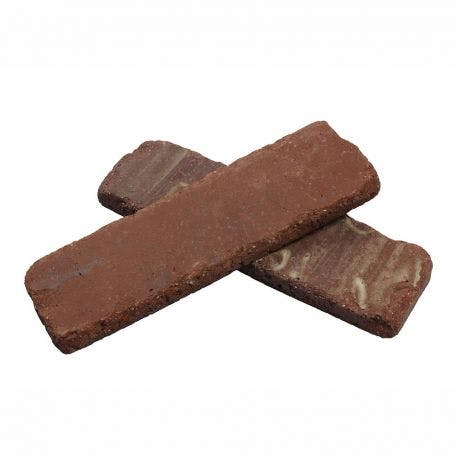
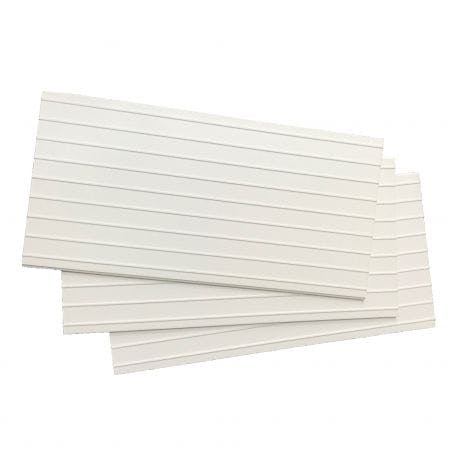
Old Mill Brick’s BrickPanel+ is a framework for installing thin brick veneer. In that regard, it is similar to BrickWebb. However, there are many differences between the two. The main difference is that BrickPanel+ uses EPS foam panels that thin brick or other thin masonry veneer is adhered to. There is a system of ridges that run along the panels to keep bricks in proper course alignment, but the bricks are not pre-attached as they are with the BrickWebb mesh. BrickPanel+ can also be attached to surfaces either with Old Mill Brick Adhesive or mechanically with screws and washers depending on the substrate.
Benefits of Using BrickPanel+
There are many benefits of using BrickPanel+ over traditional bricklaying methods, but the big three are control, speed, and labor cost. With BrickPanel+, the mason controls the whole wall from the sheathing out, including the air barrier, adhesive, insulation panel, brick, and mortar. When traditional means are used to install brick veneer, several of these layers may be installed by multiple contractors.
The speed at which the BrickPanel+ system can be installed is the second major benefit. As with other panelized thin brick systems, BrickPanel+ keeps mortar joints straight and consistent without the need for constant manipulation of individual bricks. The simple installation process is what allows for the speed of installation. Additionally, labor costs can be reduced. After your highly-skilled mason establishes the level and square on the wall, their assistants can perform the rest of the work with ease while maintaining the quality.
BrickPanel+ is a 15-Year Complete Warrantied System
BrickPanel+ is more than an easy way to install brick veneer, it is a complete system with a 15-year warranty. This system includes an air and water barrier, moisture channels, insulation, and fire resistance while keeping the installation process simple.
The air and water barrier provides protection against moisture between the substrate and exterior cladding of the building. To prevent a buildup of moisture and water damage behind the system, vertical and horizontal moisture channels in the back of the panels allow moisture to drain out of the air barrier to the bottom of the wall. The moisture then runs out using traditional water draining techniques such as weep screeds and flashing. These channels also allow for air circulation behind the panels which helps to dry out the area.
One of the beneficial properties of the BrickPanel+ system is its insulation grade. Every inch of foam panel thickness adds an R-value of 5 (up to R-20). By covering the entire surface of a wall with the system, your home or building can be more energy efficient when it comes to heating and cooling. Another benefit is the fire resistance of the system. Foam might not sound like the most fire-resistant material, but BrickPanel+ actually passes the NFPA 285 fire test. During this test, the system as a whole is exposed to fire for 30 minutes. To pass, the system must limit the vertical and horizontal spread of the fire.
The icing on the cake is the system’s simple installation process. It’s fast, involves no metal panels that need to first be installed, and eliminates alignment concerns while allowing lower-skilled laborers to install it.
BrickPanel+ Installation Process
Step 1: Prep the Wall
First, the wall must be sealed against air and moisture using Old Mill Air + Water Barrier. The moisture sealant should then be overlapped with Old Mill Polylaminate Reinforcing Fabric. And, the areas around doors, windows, and other penetrations should be sealed as well.
Step 2: Apply BrickPanel+
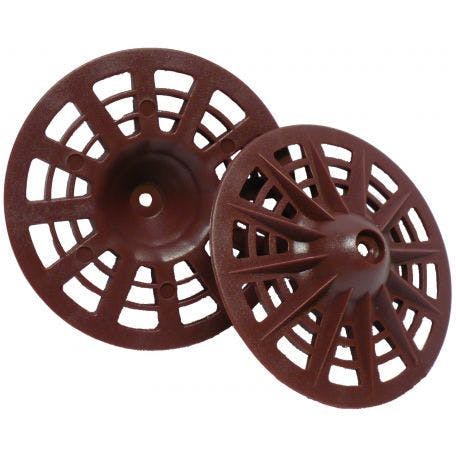
BrickPanel+ can either be applied mechanically using screws and washers or by using Old Mill Brick Adhesive. Panels should be lined up and leveled with the tongue facing upward. Side to side joints should be butted and offset from vertical joints in the panels above and below. Once you are ready to attach the system to the substrate, space out and screw the washers into the studs or apply Old Mill Brick adhesive, creating vertical draining grooves. If using washers, they should be installed flush with the foam board.
The panels should extend all the way into the corners and to window and door openings to ensure the brick is fully backed with foam and not other substrate materials. You can cut the foam panels with a hand saw or razor knife as needed to create panel sizes that fit perfectly. Once the wall is covered, allow the adhesive to set overnight before setting brick onto the panels. If using mechanical installation, brick can be set immediately following the foam installation.
Step 3: Apply Thin Brick
Begin the thin brick application at the corners. Apply chalk or marker lines at horizontal intervals to create head joint alignment. Then install the horizontal course to fit into the window sills and headers. Infill the rest of the panels to finish the installation of the thin brick.
To apply thin brick, use a grout bag to apply a line of Old Mill Brick Adhesive to the channels of the panel. Press the brick into the adhesive and wiggle it around to help the adhesive achieve full coverage on the back of the brick. Adjust the head joints to create uniform joint widths and rest the brick against the bottom lip of the row. The pointing of joints may commence immediately or any time thereafter.
Step 4: Apply Pointing Mortar
Apply pointing mortar the same way you would for a BrickWebb or regular brick installation. Overfill the joints with mortar to ensure that they are filled completely and apply as much pointing mortar as possible between tooling. Wait until the applied mortar is thumbprint hard (the mortar takes an imprint of your thumb, but no mortar sticks to it), then use a concave ⅜” or ½” jointer to tool the mortar. Scrape/brush away the excess while the mortar is still plastic. Once the mortar has dried overnight, brush/scrape away the remaining surface mortar to finish the installation.
Fizzano Brothers
Old Mill Brick’s BrickPanel+ is a complete thin brick veneer system that makes the installation process quick and simple. The installation process has just four, simple steps and can be completed in a little more than one day to account for the setting of materials. Other benefits of this system include its moisture-wicking, insulating, and fireproofing properties. Contact us today for more information on how BrickPanel+ can make your next brick veneer project easier and more cost-efficient without sacrificing quality.